Online invoicing and its approval are some of the primary features of the Online Entry timesheet and Time Approval system which is very simple and easy to use yet very effectively and efficiently manages the functions like weekly timesheet time entry its approval, invoicing and its approval.
The Online invoice and approval through xTimesheet time management software made so easy that anyone with minimum computer knowledge can work on it. And start billing to the client the invoices of the projects in no time by only putting minimum effort into it as the system automatically picks the approved hours for invoicing. With this feature, it saves a lot of time for users while creating invoices.
xTimesheet Online Invoice viewing Process
In this blog, I am going to show you the steps to create, edit, and approve invoices from xTimesheet. The mentioned steps will help to understand the user interface, how to organize your data, and use data.
To create an Invoice for any project, go to the Invoice menu.

By default, the “My Invoices” view will be selected and display user invoices with their current status. There are other views also present which can be changed by expanding the “My Invoice” dropdown.
xTimesheet Online Invoice Creation Process
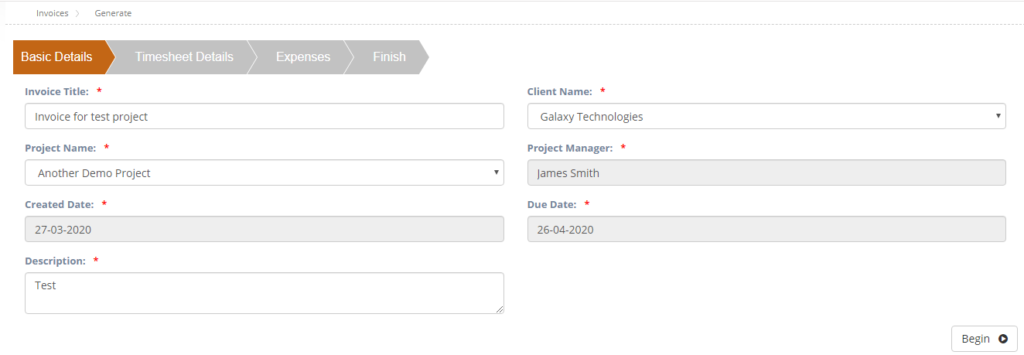
To create a new invoice, click on the New button on the top right corner a new form will display with four processes Basic Details, timesheet Details, Expense, and Finish.
Step 1: Enter the Initial details
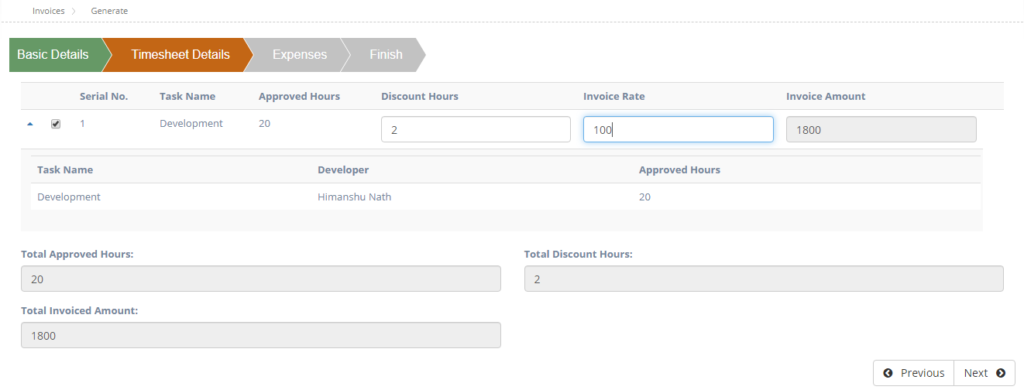
Step 2: Display approved hours automatically and users can enter any discounted number of hours which they wish to give to the client (optional feature) along with its Invoice rate. Rest calculation will be performed automatically.
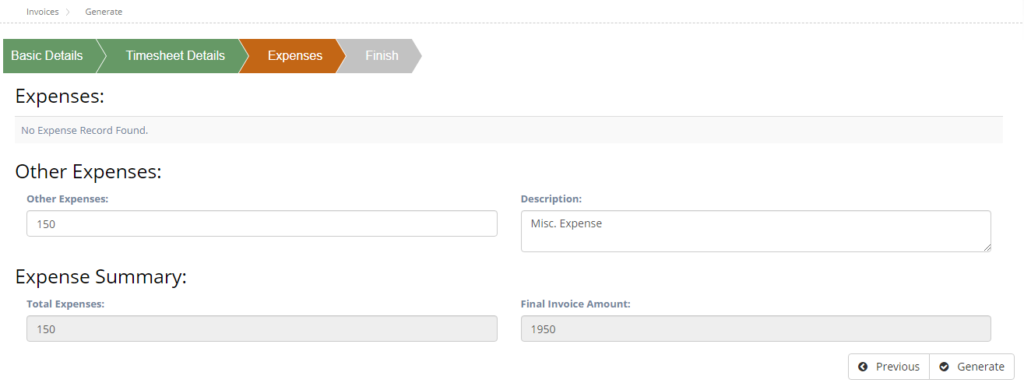
Step 3: In the next process add any expense which falls under other categories it can be added from here along with its description and the expense summary for the selected project will auto calculate its self and display.
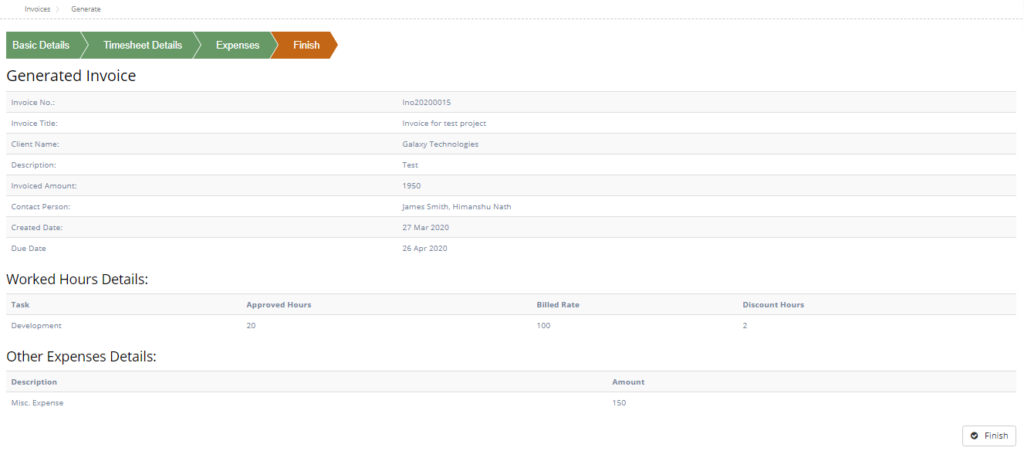
Step 4: And finally click the Generate invoice button and the process will be completed. And the invoice will be sent to the approval manager for the approval process. A final view of the Invoice which is generated will be displayed user can view all details and click the Finish button to end the process.
xTimesheet Online Invoice Approval Process
Approval of time entry done by employees is also pretty much straight forward. In order to this administrator of xTimesheet just need to assign a role of approval manager to an xTimesheet user under his signed up xTimesheet account and that user can simply log into the xTimesheet billable time tracker website and can start with approval of Invoices.
When the invoice is created for any project then the next step is to get it to approve by an approval manager. To do so click on the Approval menu and select the Invoice Approval sub-menu.
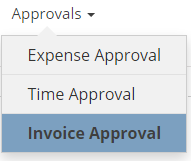
In order to approve Invoices, the User can select the required one from the default view ‘All Pending Invoices’.
Under this ‘All Pending Invoices’ view all the entries which yet to be approved by the Approval Manager will display.

Further approval manager approves the Invoices by entering the Approval remarks against each record he approves or disapproves. The approval manager can also reject any record by clicking the Red cross button. The rejected record will be sent back to the approval manager to update it and submit back for approval.
With this online time, billing software users can easily do the following functionality much more efficiently and effectively Online Entry, Time Approval, Expense Approval, invoices approval, Invoices approval Flow. It’s a project management time tracking software.

