As we talk about the current time still most of the companies relied on pen and paper to manage their timesheets. As few small businesses still rely on this obsolete method. The issue with paper timesheets can easily be interfered with, which can cost organization a large amount of money and loss of wasted admin hours. Employee expense handling is still one of the most common frustrations for both employees and managers.
With using xTimesheet expense and its approval made simple. xTimesheet diligently combines the time entry and expense entry all together in a project.
Easy Expense for Everyone
xTimesheet takes an advanced approach to expense module, with this employee can get expenses into the system quicker and more easily than with any other software in market. And as it’s completely web-based application, there’s no more waiting to get back to the office – expenses can be entered from anywhere like home or from the road while you are heading back to home. You can even track expenses through your xTimesheet mobile app.
Step 1: Add Expense
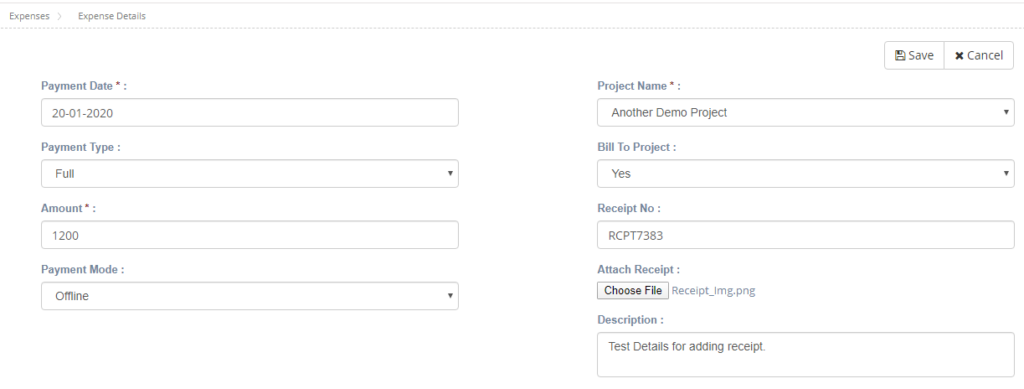
Following would be the steps to add expense to any project. To do so go to the Expense menu.

Any expense which is occurred during execution of any work related to the selected project can be added here and later on Invoicing it can be clubbed with other cost of this project.

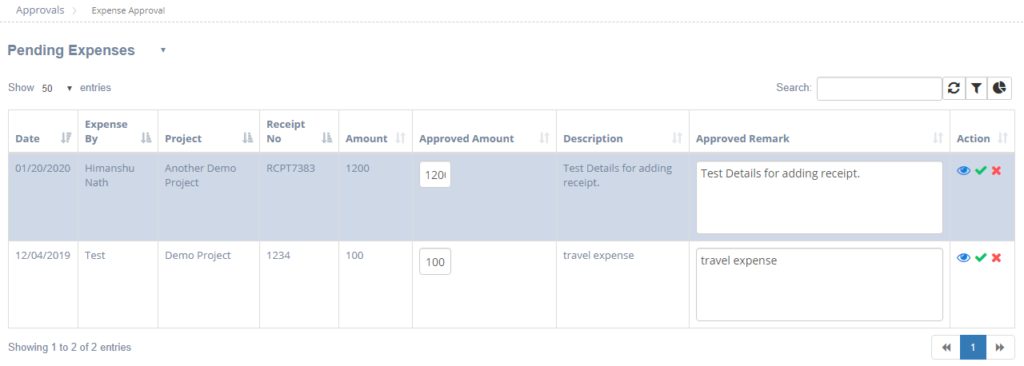
Expense approval also has following views for the approval manager for the easiness. Selected view will display all the record which falls under the selected category.

Click on the new button to add new expense. A new form will open, user will need to enter the details and click the save button.

Quick and Easy Expense Approvals
Approving expense through xTimesheet is fast. it’s as easy as clicking just an approved button against any expense record. Once approved, expenses automatically appear on selected project for payment, invoicing, or accounting. Administrator can assign the approval manager role to any of his company user who has a login credential in this xTimesheet.
Step 2: Expense Approval
Approval manager can approve or reject any expense record for any project from here. There are three actions that can be taken from here which are available in last column- first is view receipt, second is approve button and third is reject.

